Each SPIS team mentor should create Feedback repos according to the instructions below. This involves creating either six or nine repos (depending on whether your team is four or six people).
Please create:
- An individual feedback repo for each of your team members (4-6 repos)
- A pair feedback repo for each of your pairs (2-3 pairs)
Instructions for creating feedback repos
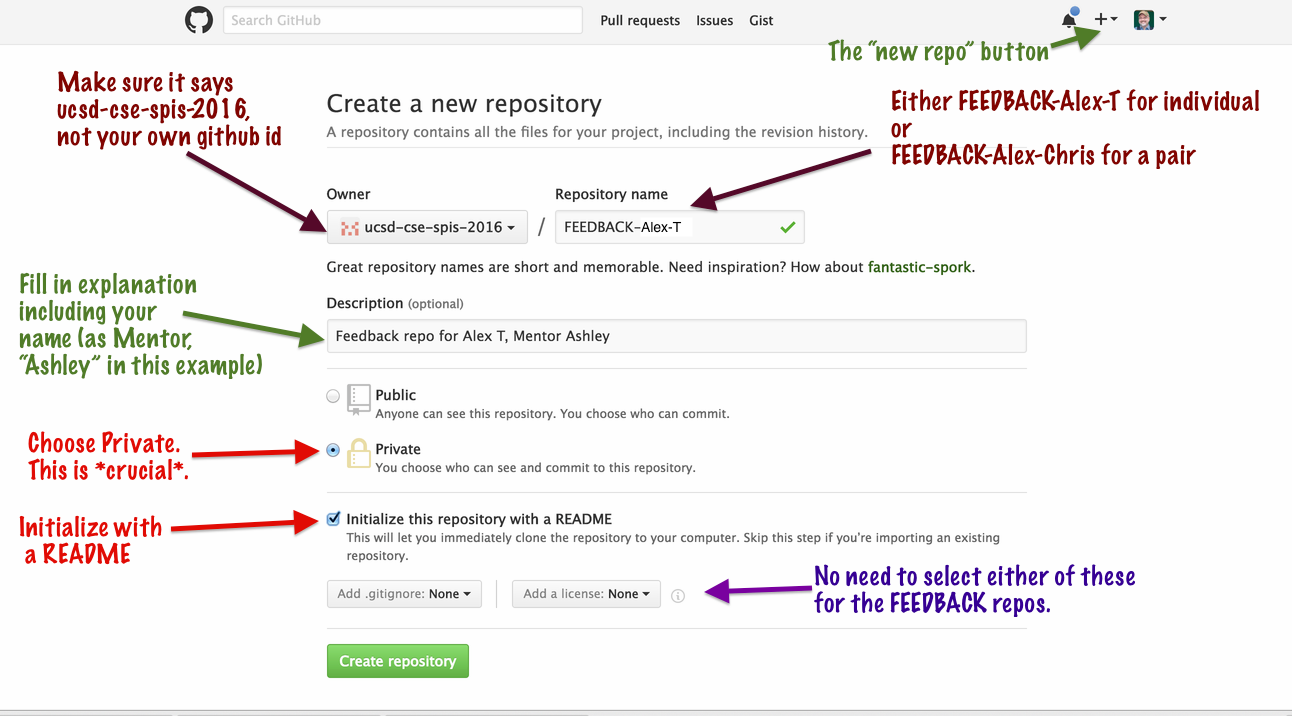
The feedback repos should be
- private
- with a README.md
- no .gitignore needed, and no license needed
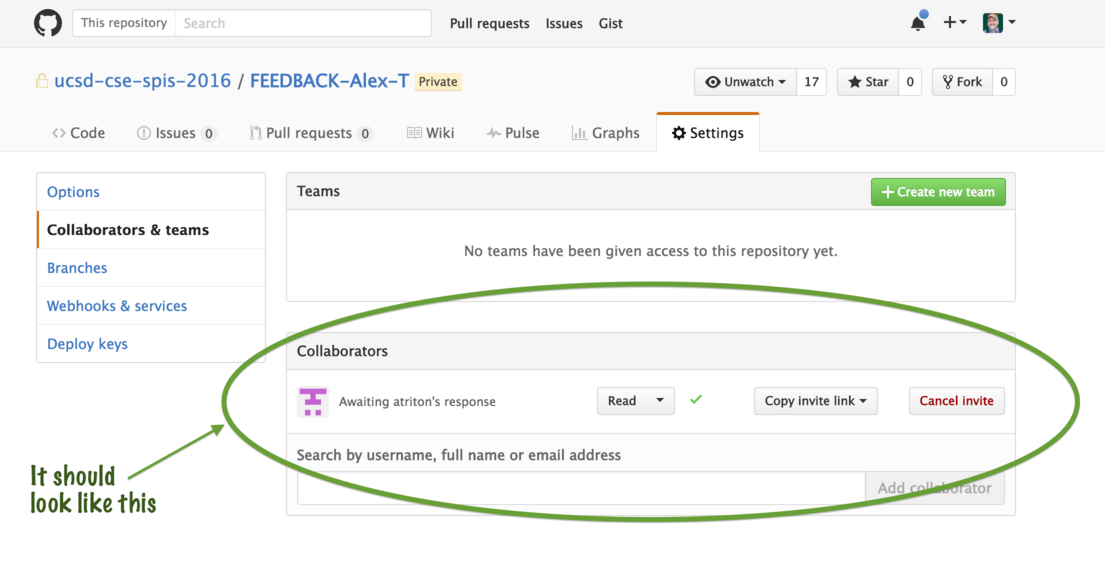
Apart from the naming convention, this diagram illustrates what it should
look like (These instructions are from SPIS 2016, but we’ll follow the same procedure. Just replace 2016 with 2017):
This spreadsheet (available only to mentors and SPIS staff) has links to each of the FEEDBACK repos that you should create for your teams.
https://docs.google.com/spreadsheets/d/1YPx3YtYVFCgCFAZU7wqZBAS7n2UUHhbc2J8odHyoQZk/edit?usp=sharing
When each of the links in your section of the spreadsheet above works properly, you’ve created the repos successfully, and are ready to add content, and make them available to the SPIS students you are giving feedback to. Those are the next steps below.
Copy/Paste the Feedback outline into each of the repos
Search for the “FEEDBACK-OUTLINE” repo on the SPIS github site. This repo has two .md files in it that you can use as outlines.
- Use the individual.md file as the outline for the README.md file for individual repos.
- Use the pair.md file as the outline for the README.md file for pair repos.
You can just use the github web page to copy/paste the content as needed (in editing mode).
NOTE: As you paste this information in, customize the top part with the correct names of the students, and their github ids. Having the github ids visible in the README.md will make the next step much easier.
Once you’ve added these outlines to the repos, you are ready to give access to the students.
Add the individual or pairs as read-only collaborators
By default, these are private repos, so only the creator of the repo (the mentor) and other SPIS staff have access.
You will now give the students read only access to their own repos (only.)
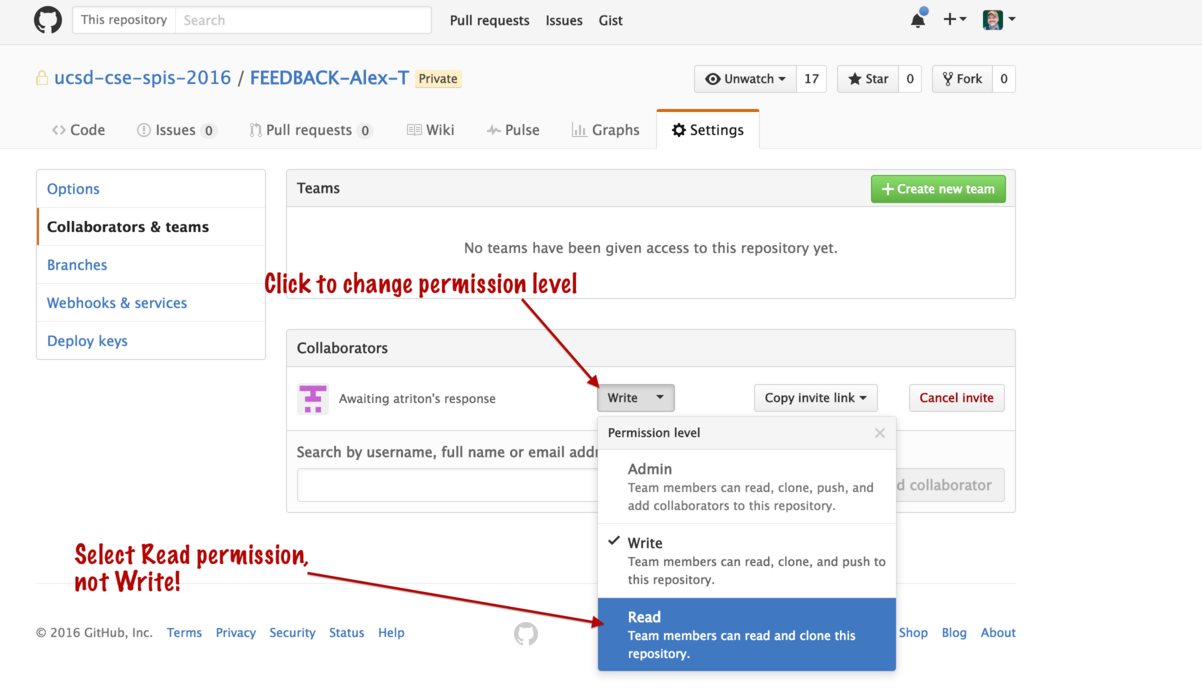
Note that you do this by adding them as collaborators. By default, collaborators have write access, so you will need to override the default to give them read only access.
Here’s how, described as both a list of steps, and a list of images.
-
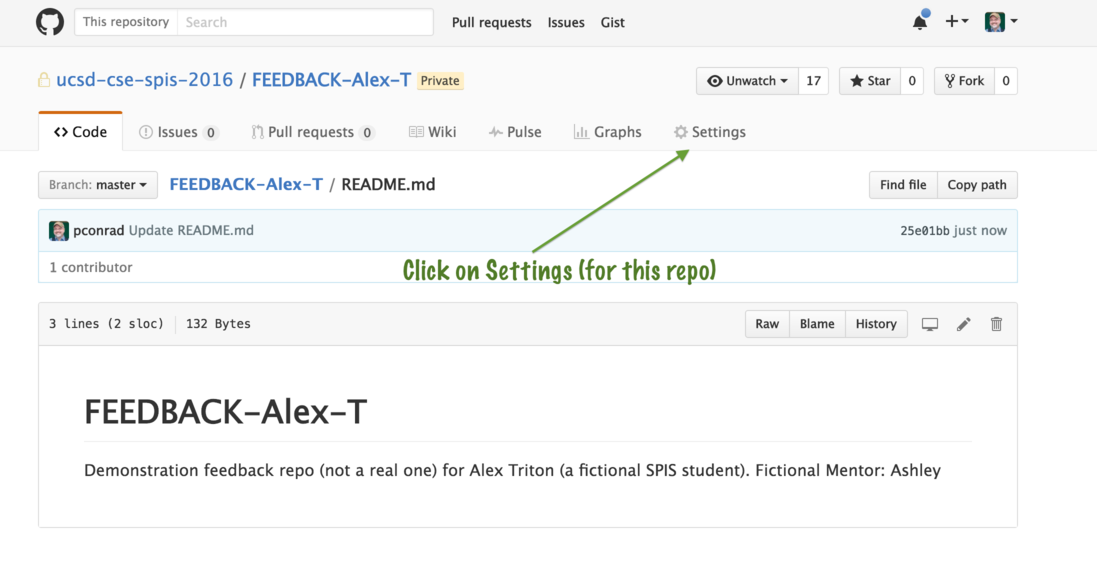
Navigate to the repo page, and click on Settings for the repo
-
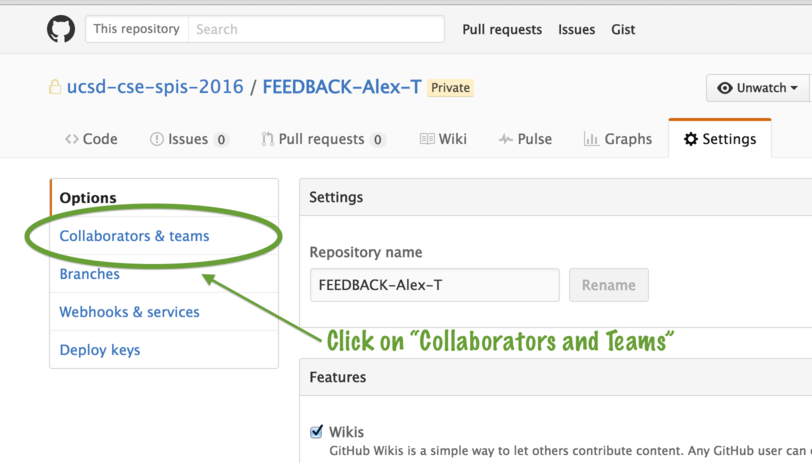
Select “Collaborators and Teams” from the menu at right
-
On the lower half of the page, in the “Add Collaborator” section, type in each students github id.
Click the github id when it appears. BE SURE IT IS ACCURATE. Otherwise, you’ll be sharing a student’s feedback with some perfect stranger. That would be very bad. So don’t do that please.

-
Then, click to add Collaborator, and the immediately click to change the default access from Write to Read.
-
When all done, it should look like this: