This page describes how to deploy OAuth Code on localhost and Heroku. After you follow these steps, you should be able to access your wep application through the heroku URL and log users in/out.
**NOTE: If you are working on your local machine, make sure to install heroku before using it in the command line. Simply type this in the command line to install heroku.
$ brew install heroku
Step 1
First make sure you are in the directory with all your web app files.
-
$ heroku login -
$ heroku create- You only need to do “heroku create” once for your web app. You are basically initializing the connection between your web application and heroku.
- Save the link that ends with herokuapp.com. This heroku URL will be used to register your OAuth.
-
$ git push heroku master- Do this step every time you want to push your code, so basically whenever you make changes to your code
Step 2 : Register on Github
- Go to Github -> Settings -> OAuth Apps -> Register a new OAuth application
- Fill in the Application Name, Homepage URL, and Authorization Callback URL as explained below
- Make sure to use https (not http) when writing both the homepage URL and the authorization callback URL (the screenshot says http but MAKE SURE YOU USE https)
- Application Name: this can be anything
- Homepage URL: copy and paste the url ending with herokuapp.com which you saved previously
- Authorization Callback URL: write the homepage URL followed by /login/authorized (url/login/authorized)
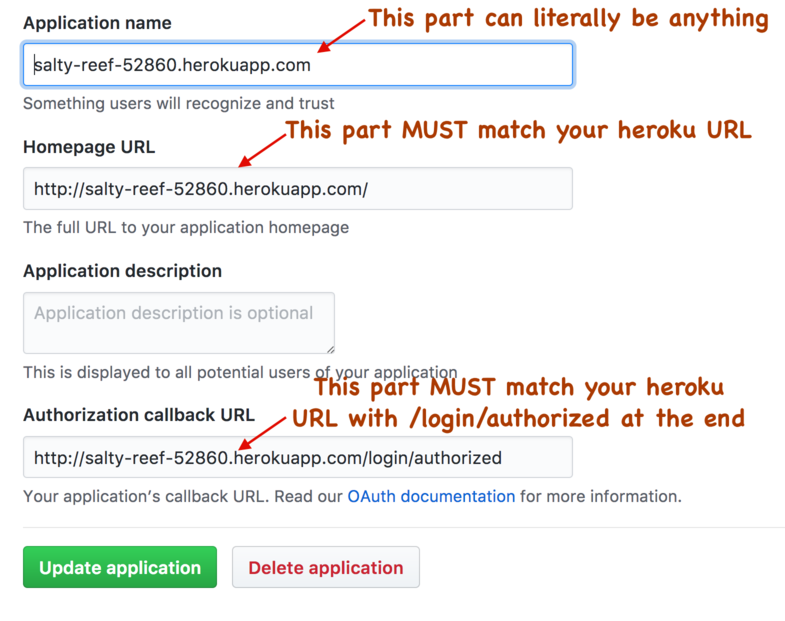
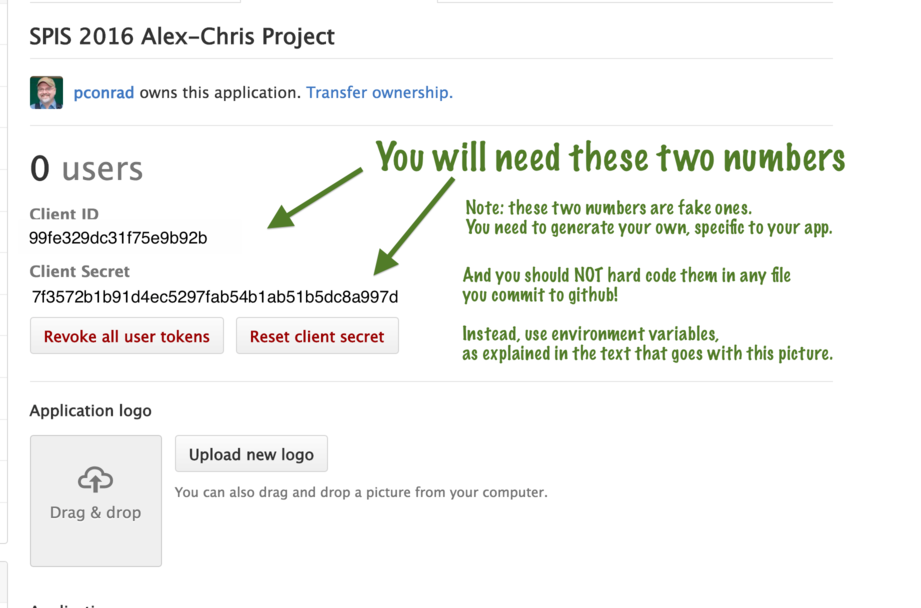
Once you register your heroku app, GitHub will generate Client ID and Client Secret values for your application. You will need these values for the next part.
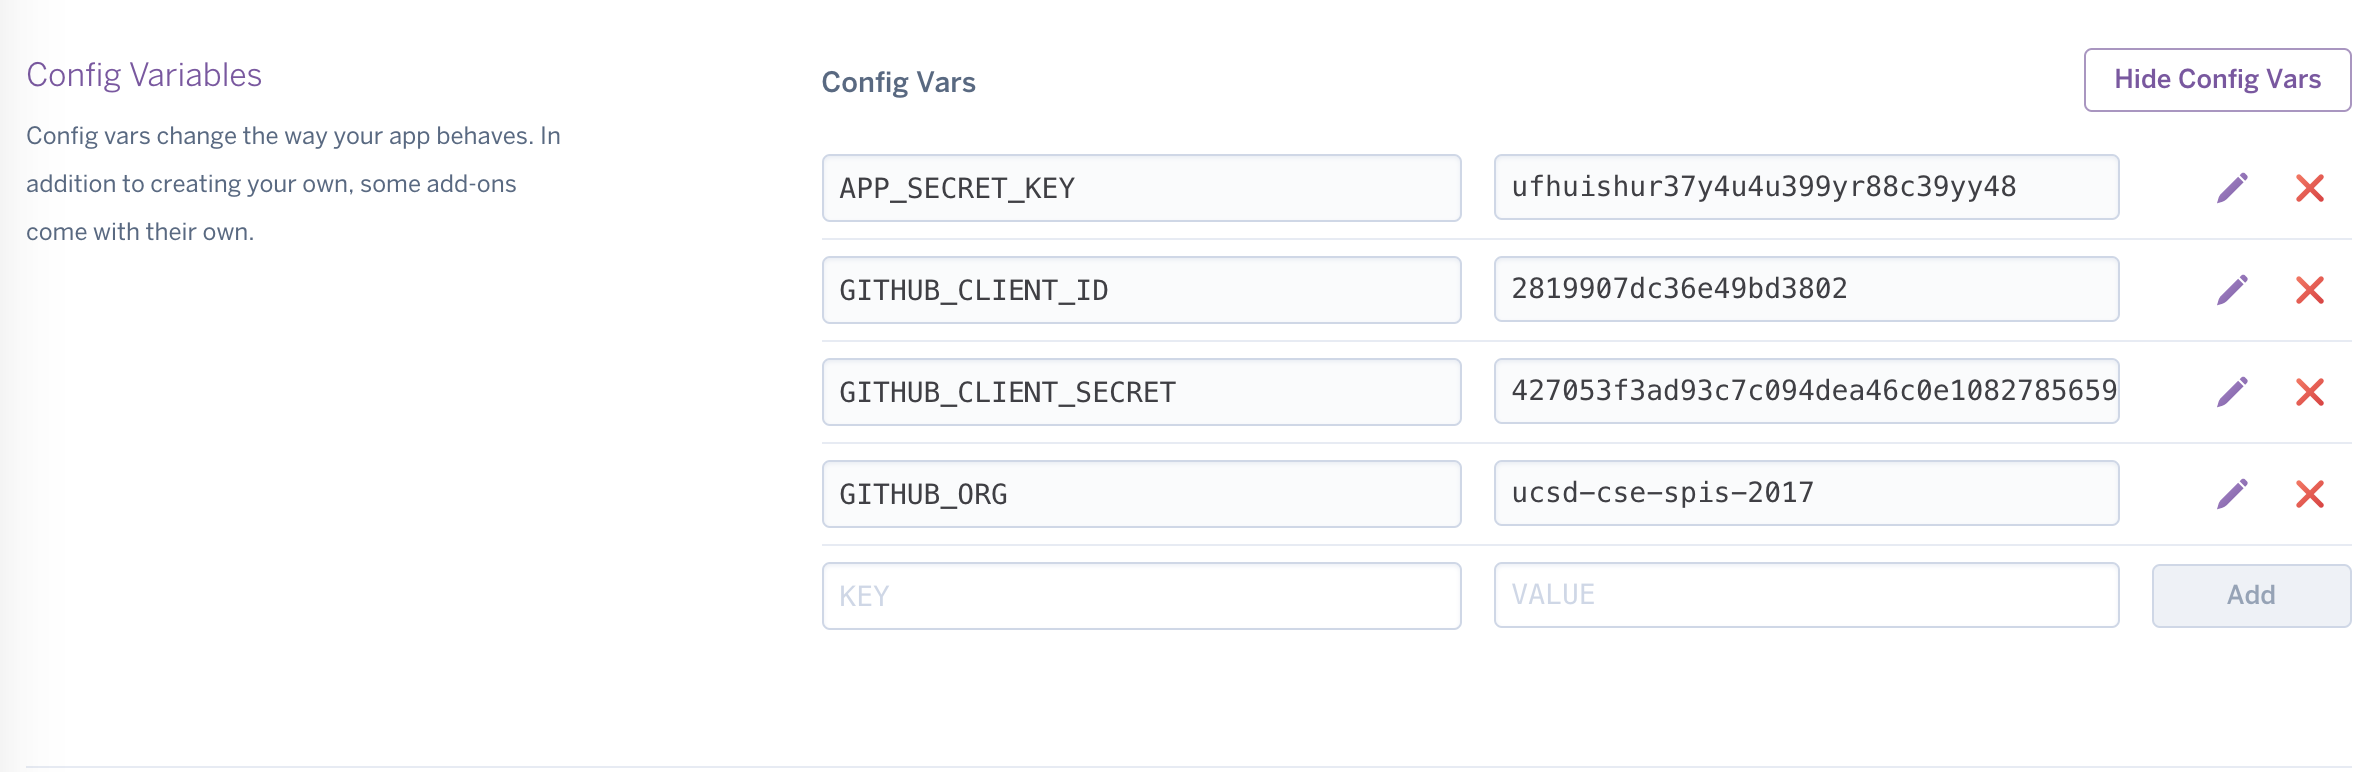
Step 3 : Register on Heroku
- Log in to your Heroku account online and select your app.
- Then under “Settings,” you will find a section called “Config Vars.” This is where you will assign values to the 4 configuration variables listed below. The screenshot below demonstrates how to assign values to the config vars.
The 4 Config Vars in Heroku:
| Key | Value |
|---|---|
| GITHUB_CLIENT_ID | This is the Client ID value generated in the previous step |
| GITHUB_CLIENT_SECRET | This is the Client Secret value generated in the previous step |
| APP_SECRET_KEY | This can be random. Just type on the keyboard randomly |
| GITHUB_ORG | ucsd-cse-spis-2017 |
After you add these 4 Config Vars, it should look something like this (with your own values filled in):
Step 4
Now go to your herokuapp URL and your app should be running!
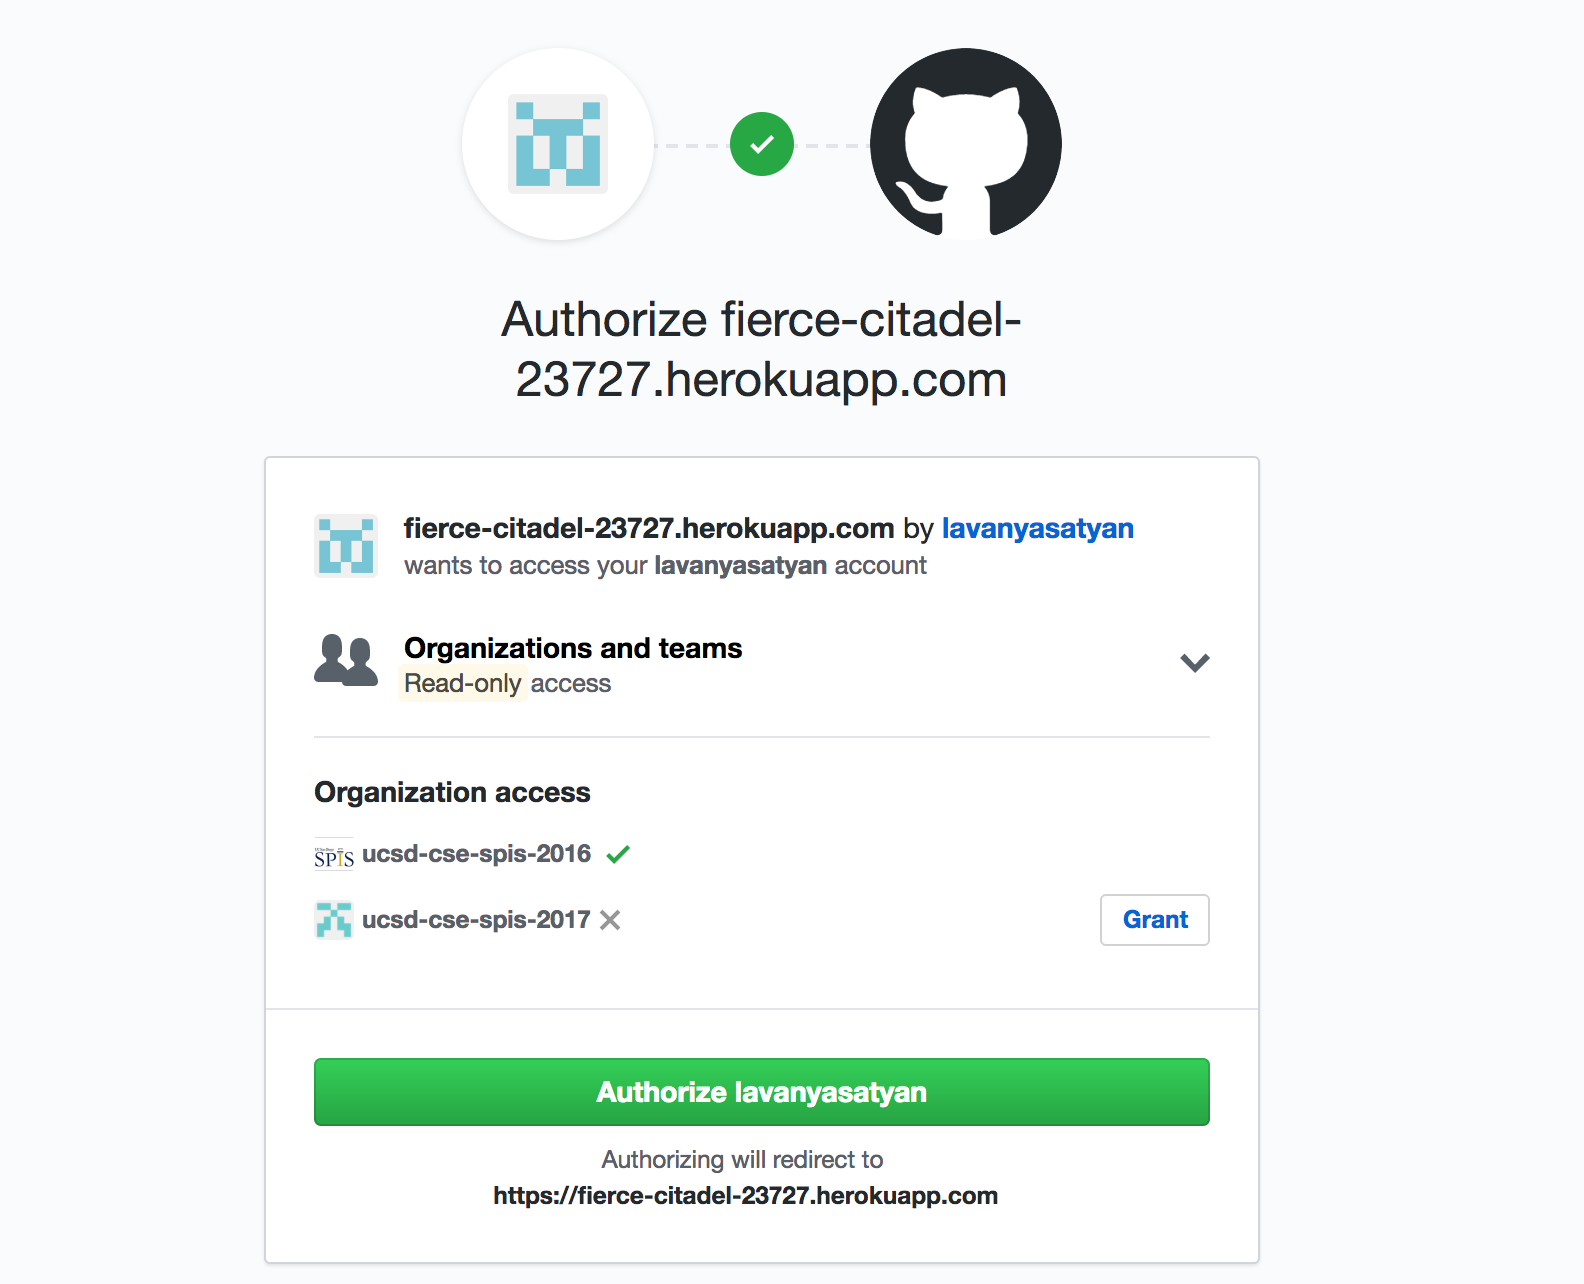
NOTE: The app owner (you) might need to authorize SPIS 2017 in order for members of SPIS 2017 to be able to log in using github. The screen should look like the one below. All you have to do is press GRANT next to ucsd-cse-spis-2017